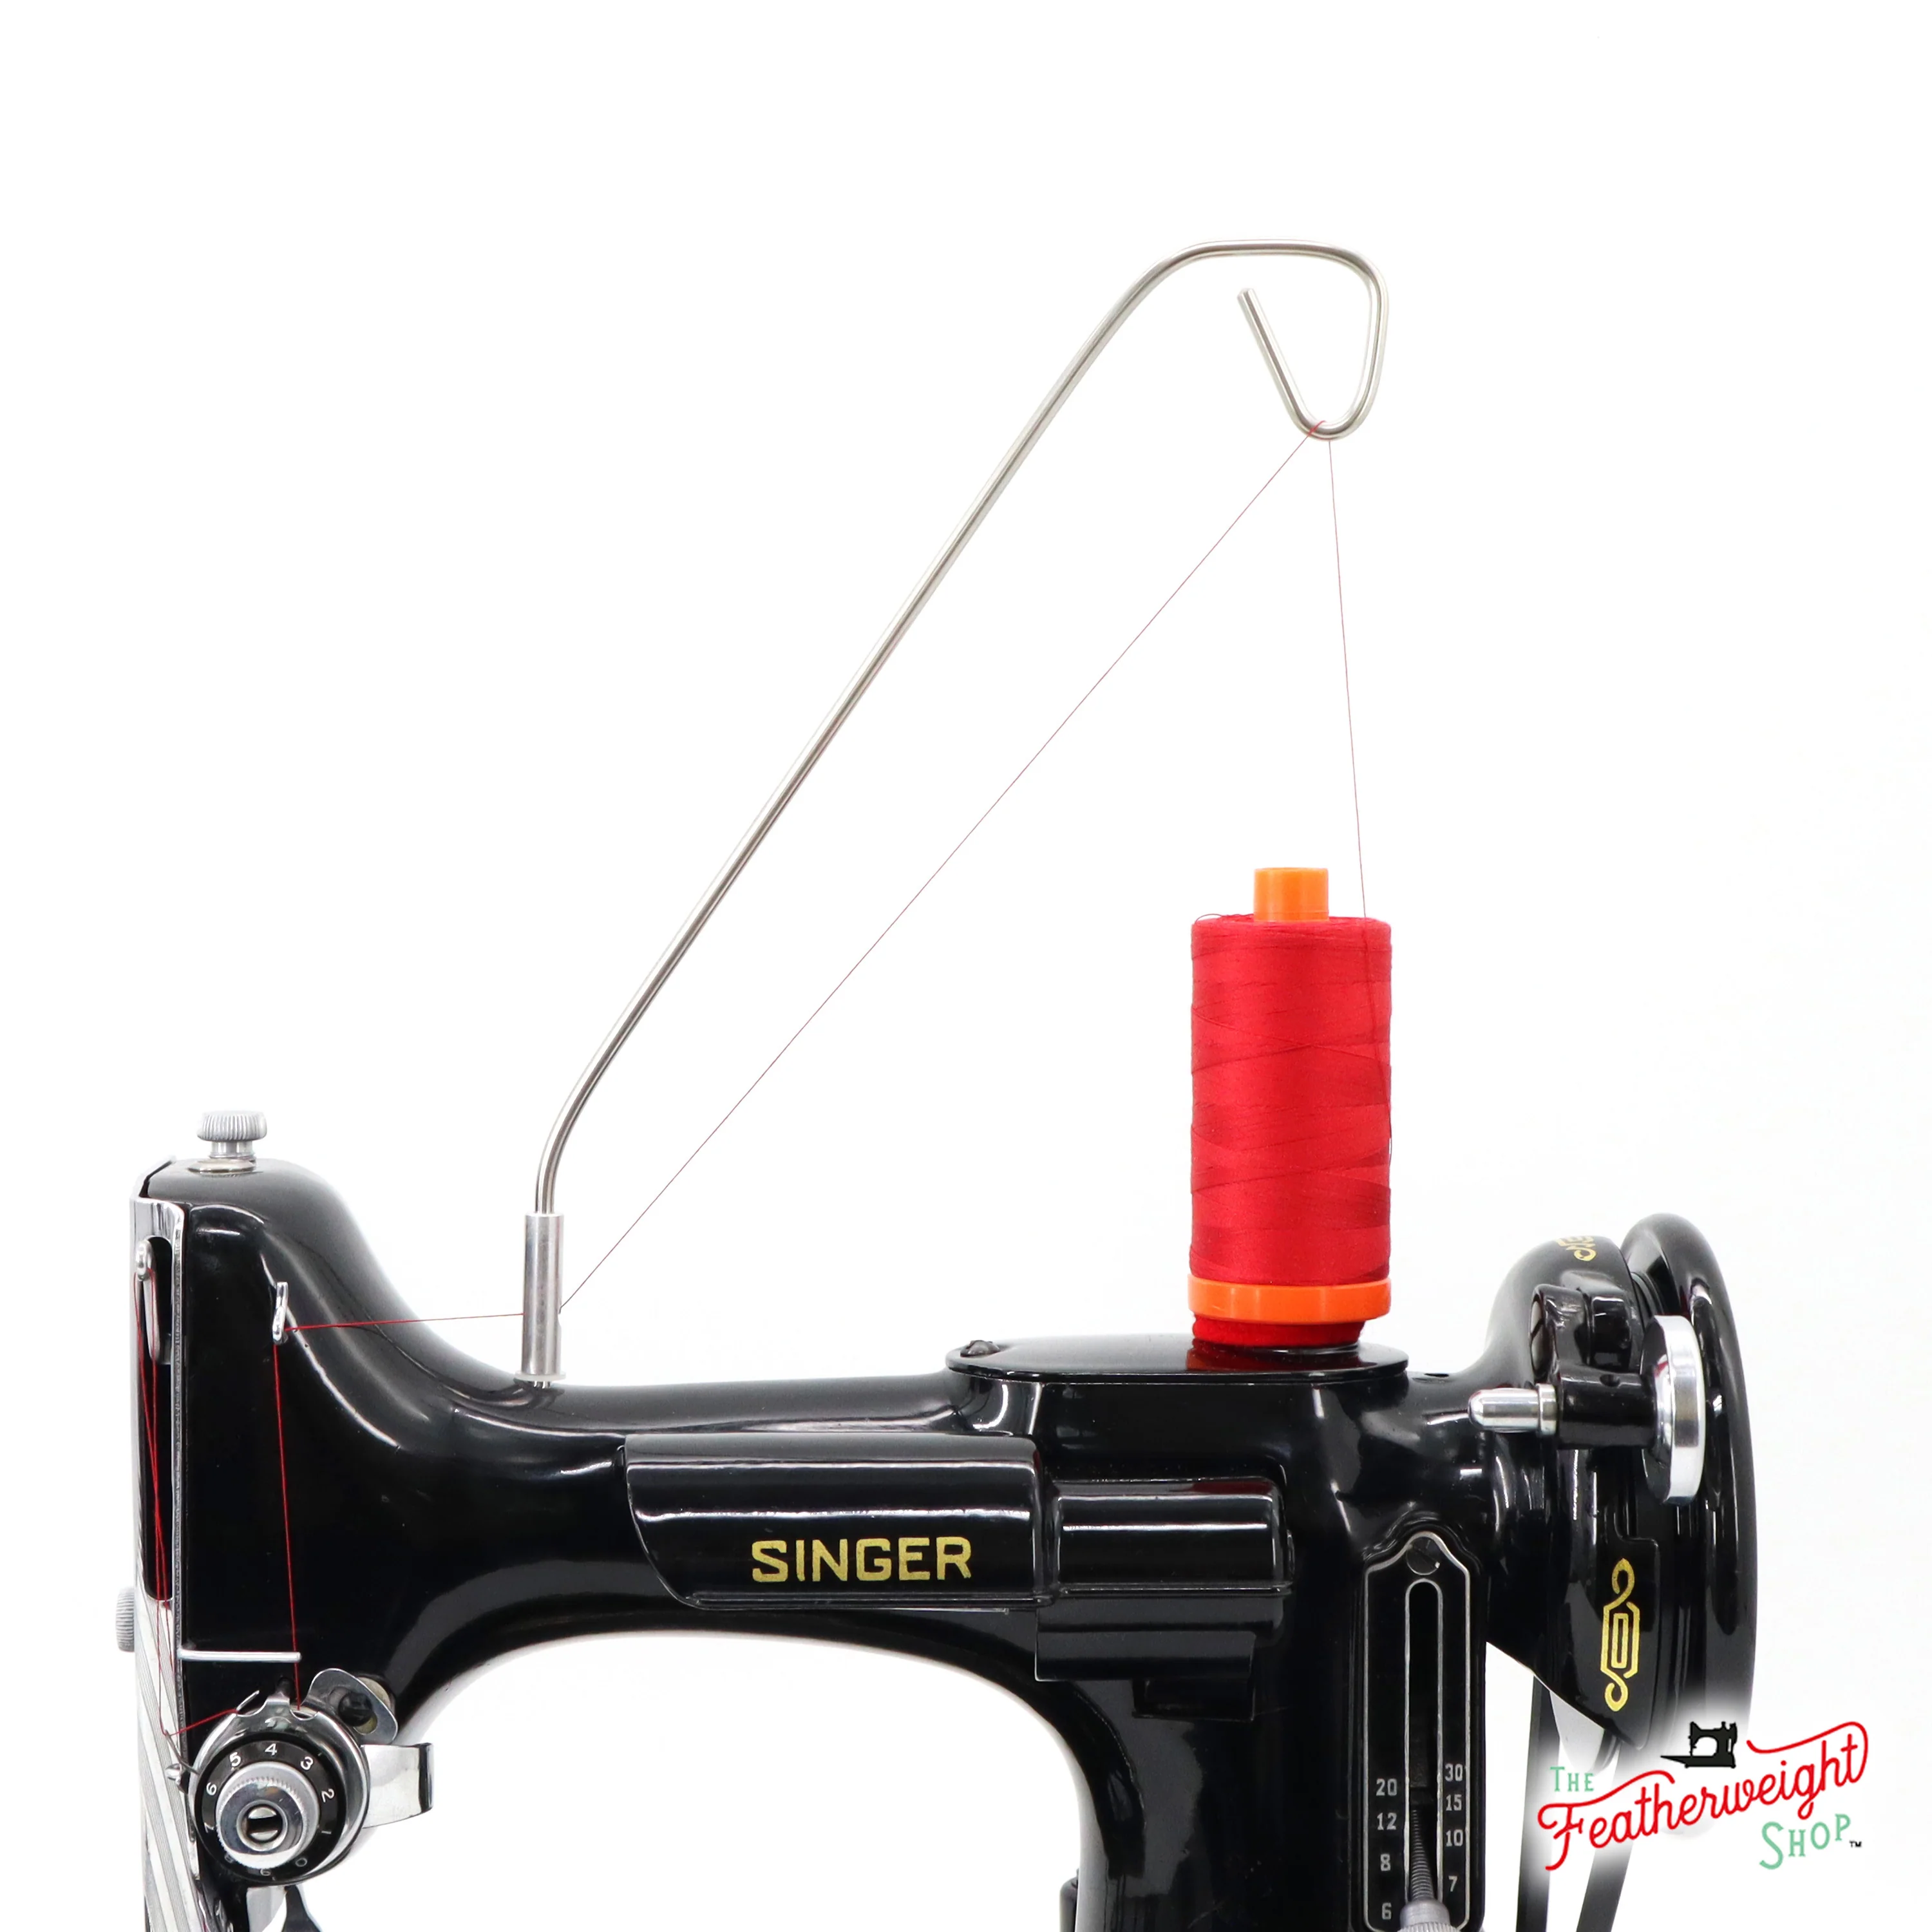
Thread Stand, Featherweight 221 222
Adapt Modern Spools to Your Vintage Machine
Your beloved Featherweight's tiny vertical spool pin just doesn't play nicely with today's big modern cones and cross-wound spools. The thread catches, jerks, and fights its way to the needle instead of flowing freely—and before you know it, you're blaming your tension or your bobbin when the real culprit has been sitting right on top of the machine the whole time.
That's why we invented the Thread Stand. It slips into the oil hole on the top left of your machine's harp and lifts your thread up and overhead, letting it glide down to the needle just as it should: smoothly, evenly, without a hitch. Standard spools, cross-wound spools, large cones from your favorite thread brand—now your Featherweight can handle them all!
Assembled right here in the USA from premium stainless steel and aluminum, the Thread Stand is precisely engineered for the Singer Featherweight 221 and 222. (It is not compatible with other Singer models.)
Designed with Your Success in Mind
- A secondary thread hole keeps your thread aligned with the machine's natural thread flow
- A protective nylon washer safeguards your machine's treasured finish
- The easily removable design slips neatly into your Featherweight case when the sewing day ends
- An updated thread path prevents slipping—whether you're running a spool on top or a cone at the back
How to Thread It
Step 1: Slip the thread through the large loop at the top of the stand.

Step 2: Thread through the base of the shaft before proceeding to the first thread guide on your machine.


For larger cones, simply adjust the Thread Stand's placement front to back, allowing the thread to flow smoothly from your table setup:
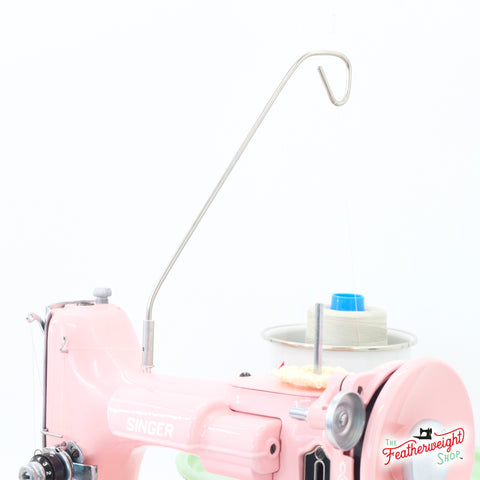
Making It Perfect for Your Machine
Most Featherweights welcome the Thread Stand perfectly, but these beloved machines can vary ever so slightly. If the fit needs adjusting:
- Too snug? Gently customize the base with a nail file or 100-grit sandpaper.
- Too loose? Add stability with heat-shrink rubber tubing (available at hardware stores).
And don't hesitate to reach out if you need guidance—we're here to help you get the perfect fit!
Watch It in Action
We've made a detailed video showing exactly how the Thread Stand works—and all the possibilities it opens up for your creative projects.
Made in the USA—honoring your quilting heritage while embracing modern convenience.
Adapt Modern Spools to Your Vintage Machine
Your beloved Featherweight's tiny vertical spool pin just doesn't play nicely with today's big modern cones and cross-wound spools. The thread catches, jerks, and fights its way to the needle instead of flowing freely—and before you know it, you're blaming your tension or your bobbin when the real culprit has been sitting right on top of the machine the whole time.
That's why we invented the Thread Stand. It slips into the oil hole on the top left of your machine's harp and lifts your thread up and overhead, letting it glide down to the needle just as it should: smoothly, evenly, without a hitch. Standard spools, cross-wound spools, large cones from your favorite thread brand—now your Featherweight can handle them all!
Assembled right here in the USA from premium stainless steel and aluminum, the Thread Stand is precisely engineered for the Singer Featherweight 221 and 222. (It is not compatible with other Singer models.)
Designed with Your Success in Mind
- A secondary thread hole keeps your thread aligned with the machine's natural thread flow
- A protective nylon washer safeguards your machine's treasured finish
- The easily removable design slips neatly into your Featherweight case when the sewing day ends
- An updated thread path prevents slipping—whether you're running a spool on top or a cone at the back
How to Thread It
Step 1: Slip the thread through the large loop at the top of the stand.
Step 2: Thread through the base of the shaft before proceeding to the first thread guide on your machine.
For larger cones, simply adjust the Thread Stand's placement front to back, allowing the thread to flow smoothly from your table setup:
Making It Perfect for Your Machine
Most Featherweights welcome the Thread Stand perfectly, but these beloved machines can vary ever so slightly. If the fit needs adjusting:
- Too snug? Gently customize the base with a nail file or 100-grit sandpaper.
- Too loose? Add stability with heat-shrink rubber tubing (available at hardware stores).
And don't hesitate to reach out if you need guidance—we're here to help you get the perfect fit!
Watch It in Action
We've made a detailed video showing exactly how the Thread Stand works—and all the possibilities it opens up for your creative projects.
Made in the USA—honoring your quilting heritage while embracing modern convenience.
Description
Adapt Modern Spools to Your Vintage Machine
Your beloved Featherweight's tiny vertical spool pin just doesn't play nicely with today's big modern cones and cross-wound spools. The thread catches, jerks, and fights its way to the needle instead of flowing freely—and before you know it, you're blaming your tension or your bobbin when the real culprit has been sitting right on top of the machine the whole time.
That's why we invented the Thread Stand. It slips into the oil hole on the top left of your machine's harp and lifts your thread up and overhead, letting it glide down to the needle just as it should: smoothly, evenly, without a hitch. Standard spools, cross-wound spools, large cones from your favorite thread brand—now your Featherweight can handle them all!
Assembled right here in the USA from premium stainless steel and aluminum, the Thread Stand is precisely engineered for the Singer Featherweight 221 and 222. (It is not compatible with other Singer models.)
Designed with Your Success in Mind
- A secondary thread hole keeps your thread aligned with the machine's natural thread flow
- A protective nylon washer safeguards your machine's treasured finish
- The easily removable design slips neatly into your Featherweight case when the sewing day ends
- An updated thread path prevents slipping—whether you're running a spool on top or a cone at the back
How to Thread It
Step 1: Slip the thread through the large loop at the top of the stand.
Step 2: Thread through the base of the shaft before proceeding to the first thread guide on your machine.
For larger cones, simply adjust the Thread Stand's placement front to back, allowing the thread to flow smoothly from your table setup:
Making It Perfect for Your Machine
Most Featherweights welcome the Thread Stand perfectly, but these beloved machines can vary ever so slightly. If the fit needs adjusting:
- Too snug? Gently customize the base with a nail file or 100-grit sandpaper.
- Too loose? Add stability with heat-shrink rubber tubing (available at hardware stores).
And don't hesitate to reach out if you need guidance—we're here to help you get the perfect fit!
Watch It in Action
We've made a detailed video showing exactly how the Thread Stand works—and all the possibilities it opens up for your creative projects.
Made in the USA—honoring your quilting heritage while embracing modern convenience.


